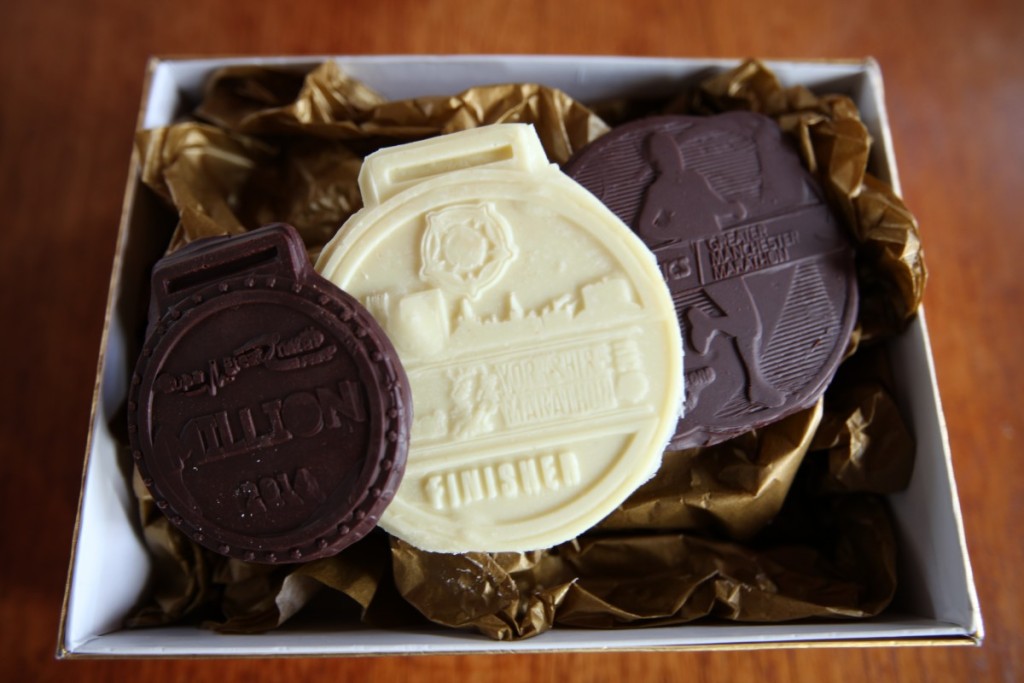
What should you do with your old race medals? This is a problem familiar to all runners. You could hang them up and let them gather dust. You might hide the in a drawer and forget about them. OR, if you’re really smart, you could turn your race medals into CHOCOLATE! That way, you celebrate your successes again and get to eat them too – talk about win-win. Chocolate Race Medals also make great surprise gifts for the runner in your life – imagine their joy at wolfing down that marathon medal… And they look fab wrapped in cellophane and hung on the Christmas tree.
Chocolate Race Medals are really easy to make and good fun if you get the kids involved (though be warned, they will no doubt want to mould other things too – cue chocolate Lego). All you need is some food-grade silicon putty, a bit of time to play in the kitchen and some decent chocolate. I got mine from Hotel Chocolat, along with some great tips for melting and tempering chocolate. You can use any kind of chocolate. I made white, dark and milk chocolate medals (well, I had to test them all, didn’t I?!) And I was also rather pleased to come across this article on Runner’s World: Why runners should eat chocolate. Seems like Chocolate Race Medals were meant to be…
The instructions below look long but don’t worry, they’re very straightforward. I’ve just spelt out every step to make sure it’s clear.
One word of caution: the putty starts to set in just a few minutes so make your medals one at a time or all you’ll end up with is lumps of hard putty! In the UK, the putty costs around £13 for enough to make about 4 medals but the moulds are reusable so it’s a sound investment.
Chocolate Race Medals
You need:
1 pack of food-grade silicon putty – I bought Hiflex Food-Grade Silicone
About 30g chocolate for each medal – any kind.
Method
To make the moulds:
1 Preheat the oven to the temperature stated on the instructions that come with the putty.
2 Carefully snip the ribbons off your medals (you can reattach them later) and clean and dry each medal carefully. Sterile wipes and kitchen roll work well for this.
3 Mix the putty according to the instructions (it comes in two separate containers and has to be mixed together by hand). You’ll need to use your judgement but two balls the size of small walnuts should be enough for most race medals.
4 When the putty is well blended, roll it out slightly (like thick pastry) to even out the surface.
5 Press one of your medals firmly into the putty, making sure that the sides are high enough to stop the melted chocolate pouring out.
6 Repeat the process with each medal.
7 Place the moulds on a baking tray and cook according to the instructions.
8 Allow the moulds to cool before adding the chocolate.
To make the medals:
1 Break the chocolate into small pieces (this helps it to melt evenly) and place in a large jug.
2 Heat slowly in the microwave (for 30seconds, then 5 seconds at a time – chocolate burns easily so you want it just melted).
3 Pour the chocolate onto your kitchen worktop and spread it finely with a palate knife. Bring it back to the centre, spread it out again and repeat several times. This will help the chocolate to keep its sheen when it sets.
4 Use the palate knife to slide the chocolate back into the jug then pour it into each of your moulds.
5 Place the moulds in the fridge to set the chocolate.
6 When they’re set, gently ease the medals out of the moulds. Tidy up any rough edges by dipping a sharp knife in hot water, drying it with kitchen roll and smoothing out little lumps and bumps.
7 Eat, enjoy, give as gifts, celebrate!
Like the look of these? Don’t forget to Pin the post for later.

Oh my goodness!! I LOVE this idea!! Yum!!
I bet it would be a fun project with your daughter (though, as mum says: chocolate lego WILL happen)
Love this! Such a cool idea!
Thank you! Mum came up with it months ago but it took until I saw them to get what a cool idea it would be.